Amazon Parts: A Smarter Way To Buy

If you’ve ever tried to fix something yourself, you’ve probably met your arch-enemy:
The missing part.
The tiny screw that rolled under the fridge. The oddly shaped gasket the local store “can special order in 10–14 business days.” The printer thingy that absolutely has a name but you don’t know it.
This is exactly where Amazon parts shopping comes in clutch—if you know how to use it the smart way.
In this guide, we’ll walk through how to find the right parts on Amazon (without guessing), how to avoid counterfeits, and how to make returns your backup plan instead of your main strategy.
What Do People Mean By “Amazon Parts”?
When people say “Amazon parts,” they’re usually talking about replacement or upgrade parts sold on Amazon for:
- Appliances (washing machines, dryers, fridges)
- Electronics (laptops, phones, game consoles)
- Auto and truck parts
- Outdoor equipment (mowers, trimmers, pressure washers)
- Tools and hardware
Amazon itself does sell parts (through Amazon Basics, Amazon Commercial, etc.), but most of the inventory is from third-party brands, big manufacturers, and marketplace sellers.
Translation: Amazon is a massive parts catalog… but also kind of the Wild West if you’re not careful.
Step 1: Identify The Exact Part You Need (Before You Search Amazon)
If you start with “uhh… dishwasher clip thingy,” Amazon will happily show you 1,000 results you don’t need.
Instead, figure out exactly what you’re looking for first.
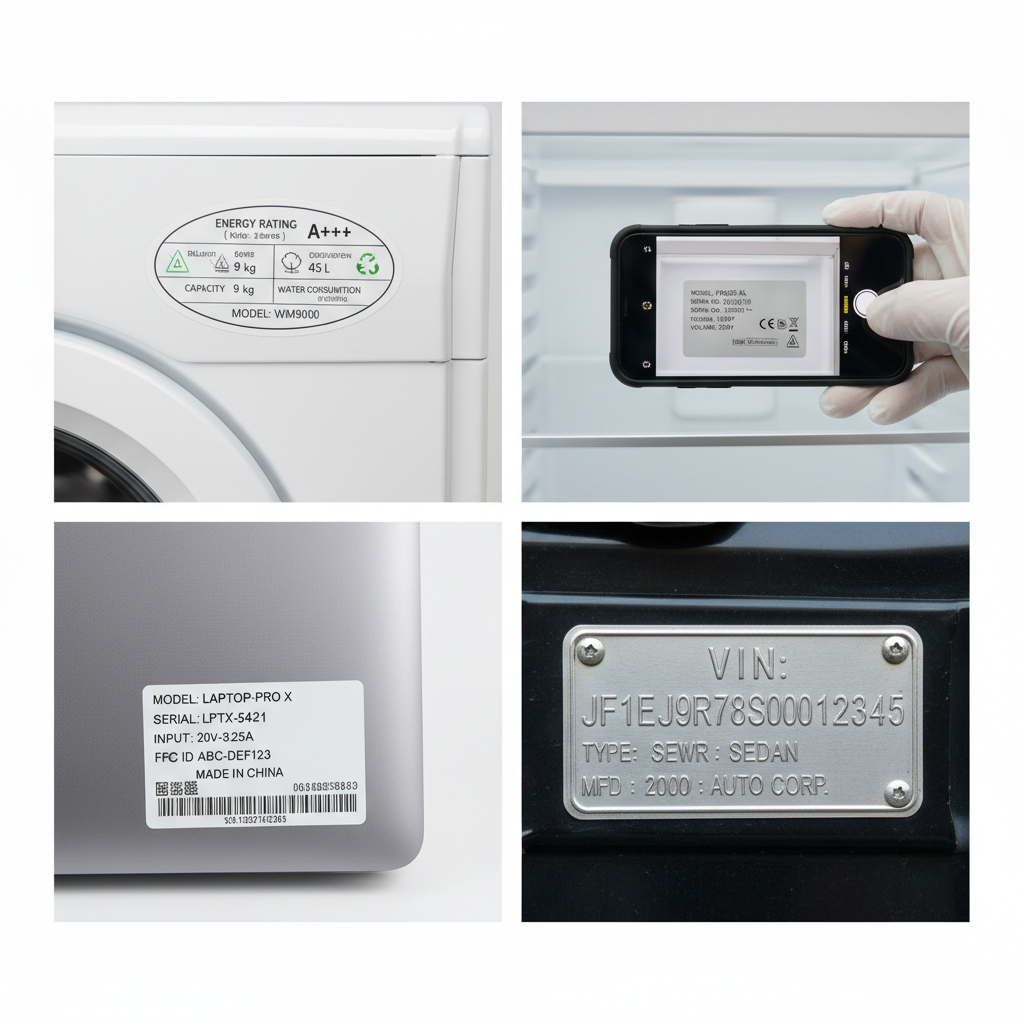
A. Find the model number
Before you even open the Amazon app:
- Check the label or sticker on your device (back, bottom, inside the door, under the battery cover).
- Snap a photo of the label so you don’t have to keep crawling behind the dryer.
- For cars, get your year, make, model, engine size, and ideally your VIN from your registration or dashboard.
B. Get the OEM part number when you can
OEM = Original Equipment Manufacturer. That’s the official part that originally shipped with your device.
You can often find the OEM part number by:
- Searching your model + “parts diagram” or “parts list” in Google.
- Checking the manufacturer’s support page.
- Looking at the old part itself (sometimes the number is molded or printed on it).
Once you have that OEM part number, copy it. That’s your golden ticket.
Step 2: How To Search Amazon For Parts (Without Getting Junk)
Now open Amazon and search smarter, not harder.
Use targeted search phrases
Combine what you know:
- OEM part number (best-case):
WB03X32194 knob - Brand + model + part type:
Samsung RF28HMEDBSR door bin - Vehicle details:
2016 Honda Civic 2.0L cabin air filter
Avoid super vague searches like “washing machine pump” or “laptop screen.” You’ll drown in irrelevant results.
Use Amazon’s fit/compatibility tools (especially for auto)
For automotive parts, Amazon has a “Garage” and fitment checker:
- Add your vehicle details (year/make/model, sometimes engine).
- Look for labels like “This fits your 2016 Honda Civic”.
For other categories, some listings have a compatibility section or a list of supported models. Always check that against your model number.
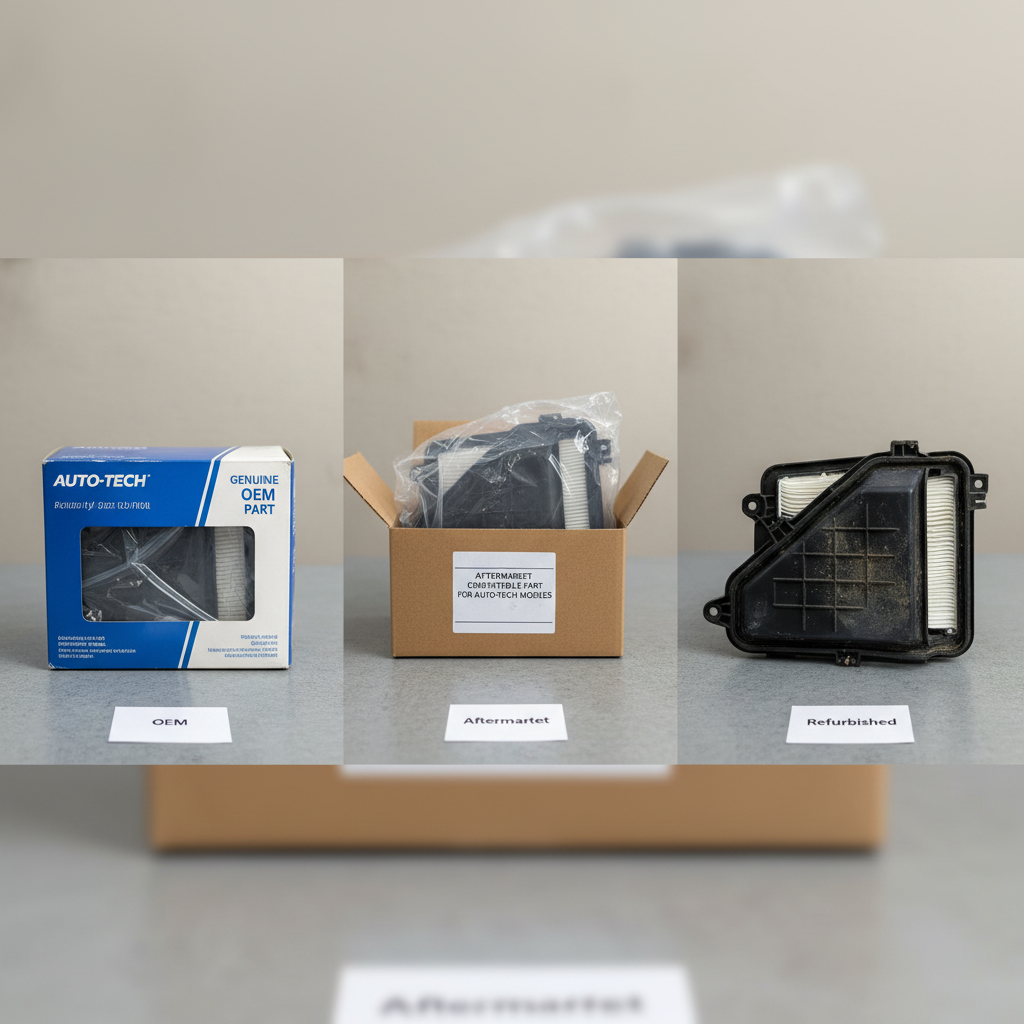
Step 3: OEM vs Aftermarket Parts On Amazon
Here’s where people get nervous: “Is this a real part?”
You’ve basically got three options:
1. OEM (Original Equipment Manufacturer)
- Made by the original brand or their official supplier.
- Usually more expensive.
- Best bet when reliability, safety, or warranty matters (brakes, electronics, gas appliances, etc.).
2. Aftermarket / Compatible / Replacement parts
- Made by third-party companies.
- Can be as good or better in many cases (filters, simple plastic or metal pieces, basic hardware).
- Way cheaper—good for non-critical parts.
3. Refurbished or used parts
- Pulled from other devices, inspected or repaired.
- Great for discontinued electronics or rare parts.
- Check description carefully for condition and warranty info.
When to lean OEM:
- Safety-related items (brakes, steering, airbag-related components).
- High-voltage or gas components in appliances.
- Parts inside expensive electronics where a failure could kill the whole device.
When aftermarket is usually fine:
- Cosmetic parts (knobs, handles, trim, covers).
- Simple mechanical parts (springs, clips, brackets).
- Filters, belts, non-critical hoses.
Step 4: How To Avoid Counterfeit Or Low-Quality Amazon Parts
The biggest risk with buying parts on Amazon isn’t that they won’t arrive.
It’s that they might be:
- Low quality
- Incorrectly labeled
- Knockoffs pretending to be OEM
Here’s how to protect yourself.
1. Check who is selling the part
Right under the price, you’ll see something like:
- “Sold by Amazon.com” – usually safer, especially for big brands.
- “Sold by [Brand Name] and Fulfilled by Amazon” – often the actual manufacturer or authorized reseller.
- “Sold by [Random Seller] and Fulfilled by Amazon” – proceed, but check more carefully.
For brand-name parts, search if the seller name matches the brand or an official distributor.
2. Read reviews like a detective
Don’t just glance at the star rating.
- Sort by Most recent to see how the part is doing lately.
- Search within reviews for “OEM”, “fake”, “counterfeit”, “did not fit”, or your model number.
- Look for photos from real buyers showing the part next to the original.
If the reviews mention:
- “Didn’t match the OEM part number”
- “Arrived used or damaged”
- “Melted, burned, or broke in days”
…that’s your cue to back out.
3. Pay attention to packaging and branding
For OEM parts:
- The listing should clearly show the brand and part number.
- Packaging photos should look like something that could be on a store shelf, not a random ziplock bag.
Generic or aftermarket parts are fine, but the listing should be honest about that.
Step 5: Returns, Warranties, And Protecting Yourself
Sometimes you can do everything right and still get the wrong part. That’s why Amazon’s return system is part of the strategy.
Before you buy, check:
- Return window – 30 days is common, but some parts are shorter.
- Return conditions – Can you return it if you installed it? Some parts must be unused.
- Restocking fees – Rare on Amazon, but can show up with some sellers.
When the part arrives:
Before you tear into the packaging or install anything:
- Compare the part number printed on the item to the listing and your original.
- Hold it next to the old part and check:
- Shape and size
- Connectors / plugs
- Mounting holes and brackets
If anything looks off, do NOT force it. That’s how you turn a $20 fix into a $400 repair.
Request a return or exchange right away and include a note or photos to speed it along.
Real-World Examples of Smart Amazon Parts Shopping
Let’s make this practical.
Example 1: Refrigerator shelf bin
Your fridge door bin cracks. Annoying, but not life-or-death.
Smart move:
- Get the fridge model number from the sticker inside.
- Search:
Whirlpool WRX735SDBM01 door bin replacement. - Compare OEM bin vs compatible aftermarket bin that fits your model.
- Read a few reviews to confirm people with your exact model say it fits.
In this case, a compatible part that’s half the price is probably fine. If it fails, worst case: your ketchup falls over.
Example 2: Car brake pads
Your car needs new front brake pads. Tempting to just pick the cheapest set with 4.5 stars.
Better plan:
- Add your car to Amazon’s Garage with year/make/model.
- Search:
front brake padswhile your vehicle is selected. - Filter by known brands (e.g., Bosch, ACDelco, Wagner, etc.).
- Read recent reviews for your exact vehicle model.
Here, going with a reputable brand and confirmed fit is worth the extra $20–$40.
Example 3: Laptop charger
Your original laptop charger dies, and you’re not paying $90 at the manufacturer’s website.
Steps:
- Grab the model of your laptop and charger wattage from the sticker.
- Search:
Lenovo 65W USB-C charger OEMon Amazon. - Look for:
- “Sold by Lenovo” or a known distributor, or
- A well-reviewed third-party charger with full specs and protections (over-voltage, over-current, etc.).
- Avoid listings that look too generic, have mismatched specs, or don’t list certifications.
Pro Tips For Buying Amazon Parts Like A Pro
To wrap this up, here’s a quick checklist you can screenshot:
Amazon Parts Buying Checklist
- Get your info first
- Model number
- OEM part number if possible
- For cars: year, make, model, engine, VIN if needed
- Search smart
- Use part numbers and full model names
- Use Amazon’s Garage / fitment tools
- Choose OEM vs aftermarket deliberately
- Pay more for safety-critical and complex electronics
- Save on cosmetic and simple mechanical parts
- Vet the seller and listing
- Prefer Amazon or official brand sellers
- Deep-read reviews, especially recent ones
- Watch for counterfeit red flags
- Protect yourself with returns
- Check return policy before purchase
- Inspect part on arrival before installing
- Don’t force-fit anything
Do this, and buying “Amazon parts” goes from “hope and pray” to “confident and convenient.”
Next time something breaks, you won’t be stuck waiting two weeks for a special order or shelling out for a full replacement.
You’ll just open Amazon, type exactly what you need… and get back to your life.
Leave a Reply